
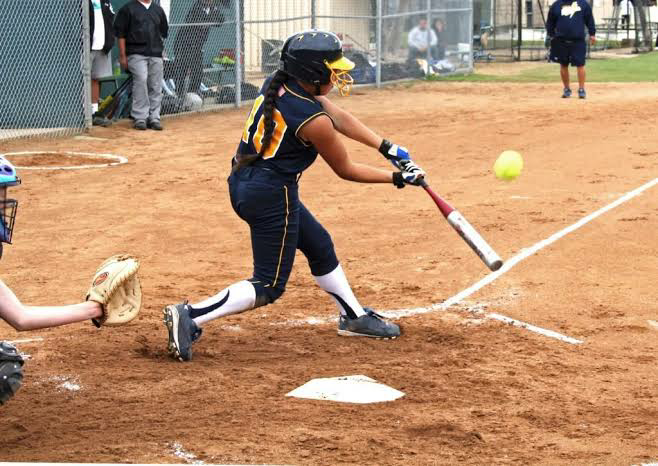
Softball can be divided into two different categories. You may join a traditional slow-pitch beer league softball game. Then there’s fastpitch softball, where the pitchers can throw so quickly that they’ll make your eyes pop out of your head. Both have distinctive appearances and league rules, and each has its place in a game or tournament context.
There are many shared characteristics between fast and slow pitch. Slow pitch is like learning to walk before you can run; it can help you get the hang of the faster speed after you’ve mastered it.
How to pitch Fast Pitch Softball
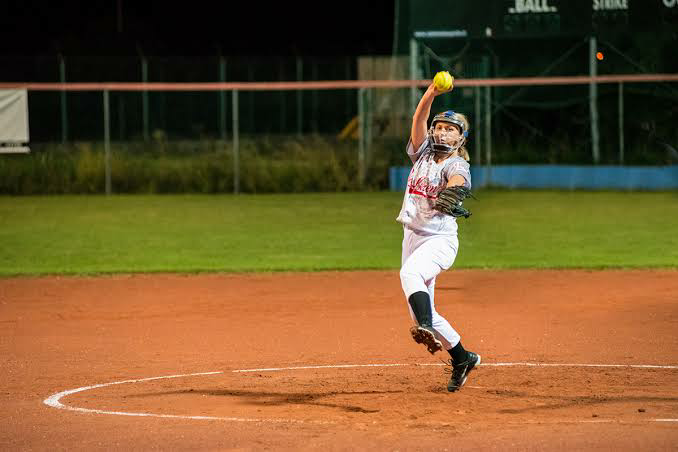
Pitching a fastpitch softball game requires high expertise, concentration, and experience. In fastpitch softball, the pitcher always aims to strike out the batter.
Setting up on the pitcher’s plate correctly is the first step in learning to pitch. Then, you should employ effective fastpitch techniques to gain speed and accuracy in your throws.
Assuming you already have a firm grasp on your pitching grip, stance, and actions, there are several drills you can undertake to gain momentum and refine your delivery.
There are similarities between slow and fast pitch in terms of some fundamental movements, but there are also significant distinctions.
Like in baseball, the objective of fastpitch is to get a strike. The goal of fastpitch is to strike the batter between the knees and shoulders, rather than trying to hit the mat like in slow pitch. The term “strike zone” refers to this area.
Making enough force to push the ball through the striking zone while still being accurate is challenging. As in slow pitch,you need to keep things going ahead. It’s also essential to keep a firm hold on the ball so you don’t let go of it before the motions are finished.
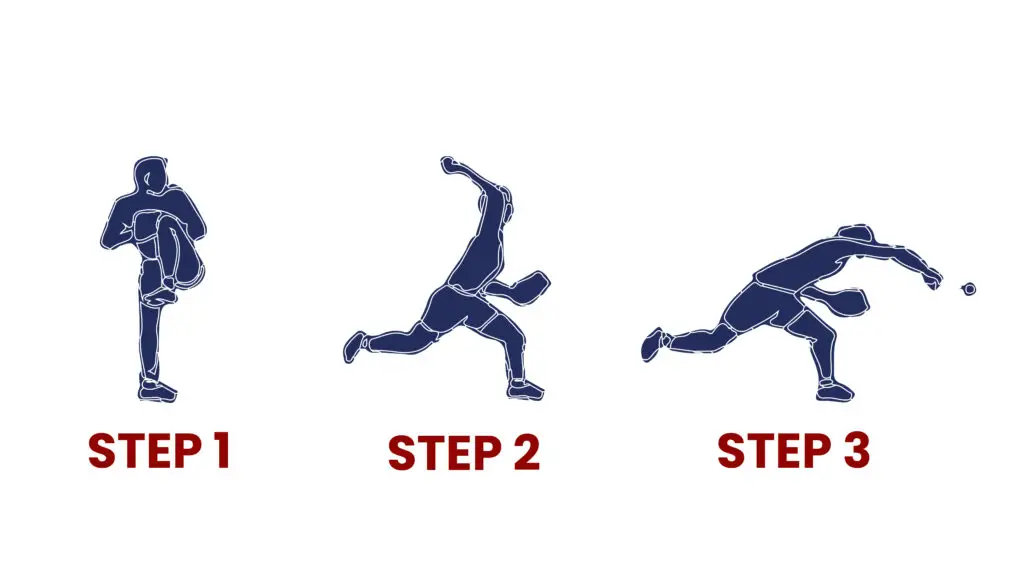
Your “kick” leg will be your left if you throw a right-handed pitcher. Get in line with your right foot on the front of the rubber and your left foot on the back.
During the swing’s initial phase, the pitcher returns their hand to waist level.
At this point, you can use your forward momentum to deliver energy. Raise your left arm to waist level, and while kicking your left foot along the ground and launching yourself forward with your right foot, bring your arm to shoulder level.
To throw more accurately, you should rotate your hips to face the target. Your arm will make a complete circle through the air to maximize your pitching strength.
As soon as your throwing hand reaches your hip, you should snap your wrist forward and brace your body. Keep your throwing motion steady by following through after you’ve released the ball.
Even if you’re used to throwing a slow pitch, your initial try at a fast pitch could not result in a strike. Learning the mechanics and strength required to strike out batters consistently is crucial to mastering the softball pitch.
How To Pitch Slow Pitch Softball
Learn how to pitch a softball like a pro if you want to be the most valuable player on your beer league team and win the title or as a young pitcher.
Despite the apparent ease of the game, good slow-pitch players have difficulty throwing strikes consistently.
Many become frightened just thinking about being on the mound and facing the hitter.
First, familiarize yourself thoroughly with the rules of where you find yourself. In most slow-pitch leagues, you should aim for the mat in front of the home plate rather than the batter.
Furthermore, rules often limit how high the ball can be thrown. Making sure to develop yourself with the softball rules is the first step in mastering the art of pitching.
You cannot use your windup to throw the ball when playing in a slow-pitch league. This means that the same speed present in rapid pitch is not possible to provide. A strike is scored when the ball is thrown in an arc so that it lands on the mat.
Tossing accurately depends on keeping your momentum going in the direction you want it to go. Raise your throwing hand over your waist while still holding the ball.
Now that you’ve started to swing your hand forward be careful to step into the throw to give yourself some forward momentum. To achieve a pleasing arch when throwing the ball, it should be released on the upswing of the pitching motion.
You won’t be very precise at first. Without actual training, it is impossible to comprehend the force required. If there is wind, for example, that will affect how hard you need to throw.
How to Throw a Slider
Grip the ball with your index finger and your middle finger
To throw a slider, grip the ball with your index finger and your middle finger. Place your thumb on the bottom of the ball. As you exhale, release the ball. As you release the ball, snap your wrists so that your fingers roll over the top of the ball. When you follow through, your thumb should end up underneath the ball.
Place your thumb on the back of the ball
A slider is a type of fastball that “slides” or “breaks” as it reaches the plate. It is one of the fastest pitches a softball pitcher can throw, and it can be very difficult for hitters to pick up. Throwing a slider requires a special grip—here’s how to do it:
Start by holding the ball in your glove in your non-throwing hand. Place your thumb on the back of the ball, and extend your other fingers behind it. Your index finger should be touching your middle finger, and your ring finger and pinky should be touching each other.
Now, transfer the ball to your throwing hand and position it in the middle of your palm, with your fingers extended behind it just as they were in your non-throwing hand. When you’re ready to throw, release the ball with a quick snap of your wrist—the ball should spin rapidly as it comes off your fingertips toward the plate.
cock your wrist behind the ball
Cocking your wrist behind the ball puts topspin on the ball. The spin causes the ball to dip or “break” as it approaches the hitter. Slider pitches are faster than curveballs, but slower than a fastball. They are also throw with a motion similar to a fastball, which can make them difficult for hitters to distinguish from fastballs.
Step forward with your non-throwing hand
Start with your fingers on top of the ball and your thumb on the bottom. Place your middle finger along the seam, and position the ball in the center of your palm. You should be able to fit your index finger between the ball and your palm. Bend your wrist so that your fingers are pointing toward the ground, then cup your hand around the ball.
How to Throw a Changeup
Grip the ball with your index finger and your middle finger
To throw a changeup, start by putting your index finger and your middle finger on the narrow part of the ball. Then, place your thumb on the bottom of the ball so that it’s resting against your middle finger. As you get ready to throw, cock your wrist back and then snap it forward when you release the ball. When you snap your wrist forward, make sure to keep your fingers in contact with the ball until it leaves your hand.
Place your thumb on the back of the ball
Grip the ball with your middle and index fingers across the narrowest part of the ball, with your thumb on the back of the ball. Your ring finger and pinky should be relaxed and not touching the ball. For a two-seam changeup, place your index and middle fingers along the seems. For a four-seam changeup, hold the ball with your index and middle fingers parallel to each other along opposite seems.
Cock your wrist behind the ball
To throw a changeup, start by cocking your wrist behind the ball. Then, grip the ball with your middle and index fingers on top of the seam. As you come through your motion, release the ball off your middle finger, letting go a little early. The idea is to make sure the ball doesn’t spin as much as a fastball.
Step forward with your non-throwing hand
Before you start your windup, step forward with your non-throwing hand. This will help you generate more power and velocity behind your pitch. As you step forward, cock your wrist back so that your changeup will have more spin when it reaches the batter.
Pitching Techniques
Grip
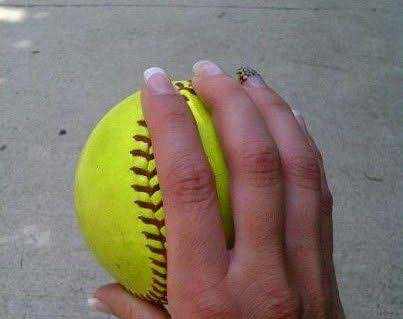
There is no one correct method to hold the ball when pitching, just as there is no one right way to do most other aspects of the craft. Most pitchers, however, are most at ease and most effective when holding the ball in a grip that permits rotation from top to bottom. To achieve this, you should rotate the softball so that the seam forms a “U” to the side rather than a vertical line. A fastball softball pitcher’s grip
If the ball is tipped on its side, the seam should be where the pitcher’s fingers rest. Holding on should be firm and stable without putting undue pressure on the wrists and forearms. Wrists should never be bent upwards or downwards or twisted to the side but kept in a straight line with the arm at all times.
Ball and Glove Together

Pitchers in most softball leagues and associations are penalized if they do not touch the ball with their glove for at least a second before throwing. While this won’t assist your pitchers’ technique, it will foster rhythm, which is just as crucial to creating effective pitches.
Although players are free to align the ball and glove wherever they like, the ideal location is in front of the torso, right around the waist. This helps the pitcher save energy by keeping the arm in a more natural position before the pitch, where it should be.
Parts of the Swing–Arm Movements
Several individual parts work together to form the foundation of a softball swing. The quality of your team’s pitches can be improved by helping them better comprehend the swing, making necessary adjustments, and practicing those new habits.
These parts include
- Backswing
- Arm rotation
- Final downswing
- Release
- Follow-through
Backswing

Focusing on getting a high backswing or making a fast backswing is a waste of time. Just as the backswing is the first step in full swing, so is the backswing the first part of the swing. The best back swing is the one the player is most comfortable with, which is usually about parallel to the ground. It’s a lot cheaper for some people.
Arm Rotation

Arm rotation is the most important aspect of the swing since it determines how fast the ball is thrown. After the back swing, the arm and body will naturally move forward. Participants’ arm rotation speeds should be maintained uniformly throughout the exercise. Pitchers who take care of themselves can use their full velocity when throwing.
To avoid injury, athletes should avoid “locking out” their elbows and instead keep them loose and at a 90-degree angle when the arm is brought around. Reduced mobility in the arm increases the risk of injury and reduces the arm’s functional range of motion.
Final Down Swing
This action concludes the rotation of the arm and comes just before the release. The effectiveness of the release is directly proportional to the quality of the final downswing. Therefore it’s important to get it right every time.
Release
The hardest phase of the swing is the release, where the smallest mistakes can majorly impact where the ball ends up. Pitchers should hold their wrists back as their arms complete their final downswing, allowing for a full snap when they release the ball.
A raised hand is required throughout the entire release. If the pitcher looked down before releasing the ball, she should have looked at her palm and not the back of her hand.
The body position is sometimes disregarded but is crucial to the release. Pitchers need to maintain a tall posture, not slouch or lean to one side. The pitcher’s arm should be fully extended before the ball is thrown, setting them up for a powerful follow-through.
For the duration of the delivery and particularly at the release, pitchers should maintain complete body and head stillness. Players can prevent injury and make more precise throws if they keep their heads still.
The arm should be at or slightly above waist level when throwing a pitch. This is the sweet spot for a strike zone, where solid, fair pitches may be made with the greatest reliability.
Follow Through
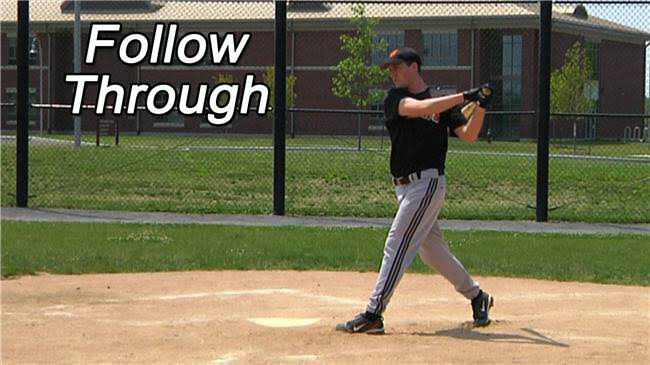
An effective follow-through is crucial for pitchers after the ball is thrown. Consistency in the follow-through is more crucial than the specific method and style used. Avoiding arm injuries requires pitchers always to keep their arms loose.
For many athletes, the elbow bends, and the follow-through reaches up to the shoulder. Though this is a familiar and comfortable starting point for many pitchers, it shouldn’t be considered the only or best way to complete the follow-through.